_THE BLISTER
The Blister
In the fourth tutorial we learnt the making process of transforming a sheet of metal into the form of a blister. By using a female hammer form we are able to create a shape that could be used to streamline the part that protrudes from a larger overall shape. This process predominantly involved hammering with a mallet (starting with the large radius end), before alternating to the smaller radius end and finally constructing corking tools to perfect the edges and teardrop end.
To assist in the project we used the following tools:
Rubber Mallet
Disc Sander
Router
Scraps of wood
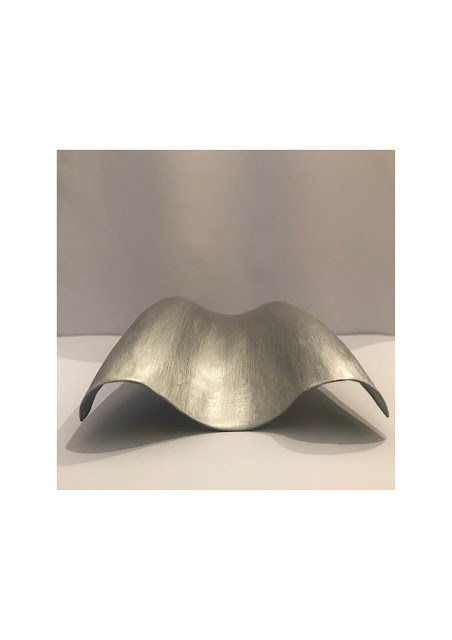
Finished product

Image Above: Completed Blister Side Perspective

Image Above: Completed Blister Top Perspective
How to make your Blister
A step by step procedure
By using the CNC cut wooden templates for the blister we ensures an accurate guide for our final shape. Next we cut a sheet of aluminium to fit the size of the wooden template before screwing and bolting all three objects together (aluminium sheet sandwiched in between) at the corners, ensuring the sheet for our blister is firmly secured before hammering.
Next we used the rubber mallet to begin stretching the aluminium and achieve depth of our blister. In this procedure I needed to be consistent with my hammering technique to ensure even stretching. It was also important to not apply too much pressure as the aluminium was likely to break as the tight positioning meant less ability to be manipulated.
To complete the tear drop corner of my template/blister i needed to sand my own custom made corking tool. For the final result of this task i used a range of 3 corking tool, each with varying edges to achieve the final outcome i.e, small rounded, wide rounded and sharp flat used to perfect edges.
Finally sandpaper and metal polish was used to complete this task.

Image Above: Steps throughout the task

Image Above: Blister Process Image

Image Above: Blister Process Image

Comments
Post a Comment